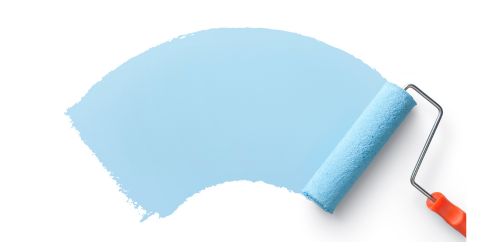
Benefits of Painting a Room
Painting a room offers numerous benefits that go beyond simply changing its appearance. One of the main advantages is the ability to create a personalized space that reflects your personality and style. Whether you prefer a calm and soothing environment or a vibrant and energetic one, the colors you choose can set the mood and ambiance of the room. Additionally, painting can also enhance the overall value of your home. If you're planning to sell your property in the future, a freshly painted room can make a big difference in attracting potential buyers and increasing the perceived value of your home.
Another benefit of painting a room is the opportunity to cover up any imperfections on the walls. Over time, walls can become worn out, stained, or have minor damages. By applying a fresh coat of paint, you can easily hide these blemishes and give your room a clean and polished look. Additionally, paint can also act as a protective layer for your walls, preventing moisture and other elements from causing damage. By investing in quality paint and proper application techniques, you can ensure that your walls will stay in excellent condition for years to come.
Steps to Painting a Room
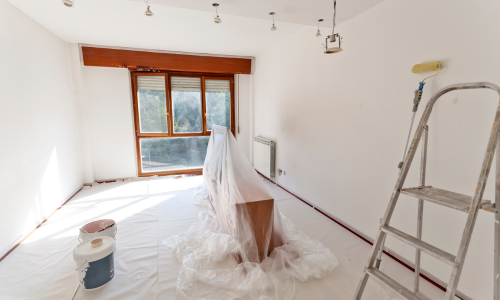
Now that you understand the benefits of painting a room, let's explore the step-by-step process to achieve professional results. Before you start painting, it's essential to prepare the room and gather all the necessary tools and materials. Begin by removing any furniture or items that can obstruct your work area. Cover the remaining furniture and floors with drop cloths or plastic sheets to protect them from paint splatters. Next, inspect the walls for any damages, cracks, or holes. Fill these imperfections with spackling compound and sand them smooth once dry.
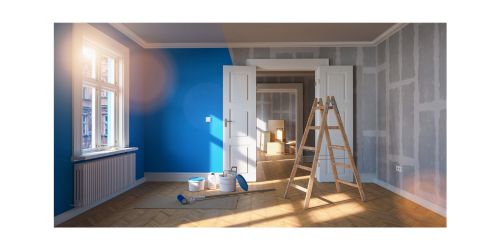
After preparing the room, it's time to choose the right paint color for your space. Consider the overall style and theme of the room, as well as the lighting conditions. Lighter colors can make a small room appear larger and more open, while darker colors can create a cozy and intimate atmosphere. It's also important to consider the psychological effects of different colors. For example, blues and greens are generally associated with calmness and tranquility, while yellows and oranges can evoke energy and happiness. Take your time to select a color that resonates with you and complements the rest of the room's decor.
Once you have your paint color, gather the necessary tools and materials. You'll need items such as paint rollers, brushes, paint trays, painter's tape, drop cloths, and a ladder. It's crucial to invest in high-quality tools to ensure smooth and even application of paint. Cheap brushes and rollers can leave streaks and result in an unprofessional finish. Additionally, make sure to have enough paint for the entire project. Calculating the amount of paint needed depends on the size of the room and the number of coats you plan to apply. Check the paint manufacturer's instructions for guidance on coverage and drying times.
Preparing the Room for Painting
Before you start painting, it's crucial to properly prepare the room to ensure a smooth and successful project. Start by removing any wall fixtures, such as electrical outlet covers and light switch plates. This will make it easier to paint around these areas without getting paint on them. Use a screwdriver to carefully unscrew these fixtures and set them aside in a safe place. Additionally, remove any nails or screws from the walls and fill the holes with spackling compound. Once the compound is dry, sand it smooth to create a seamless surface.
Next, thoroughly clean the walls to remove any dirt, dust, or grease. Use a mild detergent mixed with water and a sponge or cloth to gently scrub the walls. Pay attention to areas that are prone to getting dirty or greasy, such as near the kitchen or bathroom. Rinse the walls with clean water and allow them to dry completely before proceeding. This step is crucial as it ensures that the paint will adhere properly to the walls and result in a smooth and long-lasting finish.
After cleaning, inspect the walls for any damages or imperfections. Look for cracks, holes, or uneven surfaces. If you find any, use spackling compound to fill them in. Apply the compound with a putty knife, smoothing it out evenly. Once the compound is dry, sand it down until it is flush with the rest of the wall. This will create a seamless surface for painting and ensure that the final result looks professional. Take your time during this step to ensure that all imperfections are properly addressed.
Choosing the Right Paint Color
Choosing the right paint color is a crucial step in transforming your room. The color you select will set the mood and atmosphere, so it's essential to consider your personal preferences and the purpose of the room. If you're uncertain about which color to choose, consider creating a mood board or gathering inspiration from magazines or online sources. Take note of colors that resonate with you and match the overall style and theme of the room. Additionally, consider the lighting conditions in the room. Natural light can affect how colors appear, so it's important to test paint samples in different areas of the room at different times of the day.
When selecting a paint color, keep in mind the size of the room. Lighter colors can make a small room appear larger and more open, while darker colors can create a cozy and intimate atmosphere. If you want to add depth and dimension to the room, consider using an accent wall. An accent wall is a single wall painted in a different color or with a unique texture or pattern. This can add visual interest and create a focal point in the room. However, be mindful of the color balance and ensure that the accent wall complements the rest of the room's decor.
Once you have a color in mind, purchase a small sample of the paint and test it on the walls. Painting a small area will give you a better idea of how the color will look in the room and how it interacts with the lighting conditions. Leave the sample on the wall for a few days to observe it in different lighting situations. This will help you make an informed decision before committing to painting the entire room. Remember that paint can look different when it dries, so it's essential to evaluate the color after it has completely dried.
Tools and Materials Needed for Painting a Room
To achieve professional results when painting a room, it's crucial to have the right tools and materials on hand. Here is a list of essential items you'll need for your painting project:
- Paint rollers: Choose rollers with different nap lengths depending on the texture of your walls. Short nap rollers are suitable for smooth walls, while longer nap rollers work well on textured surfaces.
- Paint brushes: Invest in high-quality brushes of various sizes for different areas and details. Synthetic brushes are ideal for water-based paints, while natural bristle brushes are better suited for oil-based paints.
- Paint trays: Use shallow paint trays to hold the paint for your rollers and brushes. This will make it easier to load the paint onto your tools and minimize drips and spills.
- Painter's tape: Painter's tape is an essential tool for achieving clean and sharp edges. Use it to mask off areas you don't want to paint, such as trim, windows, and baseboards.
- Drop cloths: Protect your floors and furniture from paint splatters by covering them with drop cloths or plastic sheets. This will make cleanup much easier and prevent accidental damage.
- Ladder: Depending on the height of your walls, you may need a ladder to reach higher areas. Choose a sturdy and stable ladder that allows you to paint comfortably and safely.
- Paint: Of course, you'll need paint for your project. Choose a high-quality paint that suits your needs and preferences. Consider factors such as durability, washability, and finish (matte, eggshell, satin, or glossy).
Having these tools and materials readily available before you start painting will make the process smoother and more efficient. It's important to invest in high-quality tools to ensure that you achieve professional results and enjoy a hassle-free painting experience.
How to Tape a Room for Painting
Taping a room before painting is an essential step to achieve clean and sharp edges. Painter's tape is designed to adhere to the walls without damaging the paint or leaving residue. Follow these steps to properly tape a room for painting:
-
Clean the walls: Before applying tape, make sure the walls are clean and free of dust or grease. Wipe them down with a damp cloth or sponge and let them dry completely.
-
Gather your supplies: You'll need painter's tape, a putty knife, and a utility knife. Ensure that you have enough tape to cover the desired areas.
-
Start with a clean edge: Use the putty knife to press the tape firmly against the edge of the wall or trim you want to protect. Make sure the tape is straight and level.
-
Apply the tape: Unroll the tape along the edge, pressing it firmly against the wall. Make sure the tape is straight and without any bubbles or wrinkles.
-
Seal the edges: Use the putty knife to press the tape down firmly, ensuring that it adheres well to the wall. This will prevent paint from seeping under the tape and creating uneven lines.
-
Cut the tape: Once you've applied the tape to the entire area, use a utility knife to cut the tape at the corners or edges. This will create clean and precise lines.
-
Remove excess tape: After you've finished painting, remove the tape while the paint is still wet. Gently peel the tape at a 45-degree angle to avoid pulling off any paint.
By following these steps, you'll be able to tape your room like a professional and achieve clean and sharp edges. Taking the time to properly tape off areas will ensure that your paint job looks polished and neat.
Painting Techniques and Tips for Beginners
If you're new to painting, it's natural to feel a bit overwhelmed. However, with the right techniques and a few helpful tips, you'll be able to achieve professional-looking results. Here are some techniques and tips to keep in mind:
-
Start with a prime coat: If you're painting over a dark or bold color, it's recommended to apply a primer coat first. This will help the new paint adhere better and prevent the old color from bleeding through.
-
Use the W technique: When applying paint with a roller, use the W technique to ensure even coverage. Start by painting a W shape on the wall, then fill in the gaps with vertical strokes. This technique helps distribute the paint evenly and avoids streaks.
-
Cut in before rolling: Before using a roller, use a brush to cut in the edges and corners of the room. This means painting a narrow strip of paint along the edges where the roller can't reach. This will create clean lines and prevent overlap marks.
-
Don't overload your brush or roller: When loading your brush or roller with paint, avoid applying too much. Excess paint can cause drips, streaks, and an uneven finish. Instead, apply a moderate amount of paint and work in thin, even layers.
-
Work in small sections: To avoid the paint drying too quickly and resulting in visible brush or roller marks, work in small sections at a time. Paint one wall or area before moving on to the next. This will allow you to maintain a wet edge, ensuring a seamless finish.
-
Use a paint extender: If you're working in a warm or dry environment, consider using a paint extender. This additive slows down the drying time of the paint, allowing you more time to work and achieve a smooth finish.
-
Take breaks and step back: Painting can be a time-consuming process, so make sure to take breaks and step back to evaluate your progress. This will help you identify any areas that need touch-ups or adjustments.
By following these techniques and tips, you'll be able to paint a room like a pro, even if you're a beginner. Practice patience and take your time to ensure a high-quality finish that you can be proud of.
Average Cost of Painting a Room
The cost of painting a room can vary depending on several factors, such as the size of the room, the number of coats needed, the quality of paint, and whether you hire a professional or do it yourself. On average, homeowners can expect to spend between $500 and $1,500 to paint a room. This estimate includes the cost of paint, tools, and materials.
If you decide to hire a professional painter, the cost will be higher. Professional painters typically charge an hourly rate or a flat fee per square foot. The average cost for hiring a professional painter can range anywhere from $2 to $6 per square foot or more. Keep in mind that this cost may increase if you have high ceilings, intricate details, or if additional preparation work is required.
If you choose to paint the room yourself, the cost will be significantly lower. However, you'll need to budget for the cost of paint, tools, and materials. High-quality paint can range from $20 to $70 per gallon, depending on the brand and finish. Tools and materials, such as brushes, rollers, drop cloths, and painter's tape, can add an additional $50 to $100 to your budget. It's important to invest in quality paint and tools to ensure professional-looking results and a long-lasting finish.
Before starting your painting project, carefully evaluate your budget and determine how much you're willing to spend. Consider the size of the room, the complexity of the project, and your personal preferences. If you're unsure about the cost, it's always a good idea to consult with a professional painter or visit a local home improvement store for guidance and advice.
Conclusion
We hope this comprehensive guide has been helpful. With invaluable advice and techniques from our experts, even those with limited experience can achieve professional-looking results. So, let us embark on this journey together and unveil how you can transform your room into a work of art by embracing the transformative power of a fresh coat of paint.